Summer – Mackinac Island, Family and Fudge

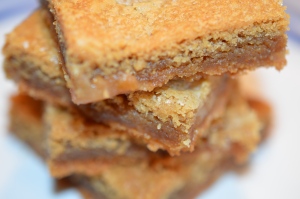
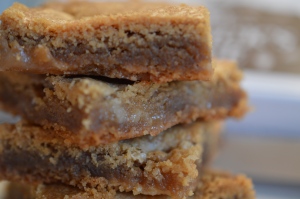
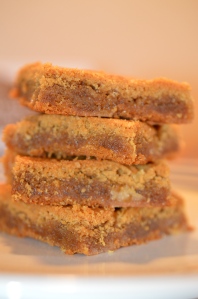
Hi Everyone! I have to apologize it’s been sooo long since I’ve written anything on here. I’ve been busy doing different things and creating new recipes. One of my favorites so far are the Maple Fudge Peanut Butter Bars I made using some fudge I bought while I was visiting Mackinac Island with my sister. We had such an awesome time on the island.

20150712_251

DSC_0535

20150712_255

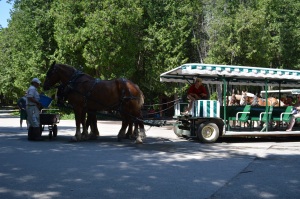
We haven’t ever spent time on the island without having conferences or something to go to too. So we were able to take advantage of all the different touristy things on this visit. One of my favorite things was the ghost tour. We had so much fun walking through town in the dark and then we got to go ghost hunting at Mission Point. I can’t recommend Haunts of Mackinac enough. Our hostess was very animated when she was telling us the stories and was very informative and entertaining. So much so that we were to scared to walk the three miles back to our hotel in the dark and instead took a taxi back. And by taxi I mean a horse and carriage with a driver. The picture below is not our carriage, but it is one of the carriage tours on the island. I took the picture below at Arch Rock.

20150712_301

We also visited arch rock. When I went up the Nicolet Watch Tower, there was a young couple taking in the view, and the young man asked if I could take their picture. I said sure, I can do that. So he handed me his phone and then whispered “actually take a video of us”. He then proposed to his girlfriend. It was the sweetest thing ever! I tried to see if they posted the video anywhere, but I haven’t been able to find it, and I didn’t get their names or anything, all I know is that they were visiting from Colorado. I wish them well though.

20150712_304

20150712_310

We also explored Anne’s Tablet, saw the crack in the island, and Sugar Loaf Rock. There are just so many things to see and do on the island, we were there for three days and didn’t get to see everything. We also visited both Fort Holmes, which wasn’t open yet, and Fort Mackinac, and had lunch at the Tea Room there. The view was amazing.

Fort Holmes

       Fort Holmes on Mackinac Island

20150712_211

View from The Tea Room at Fort Mackinac

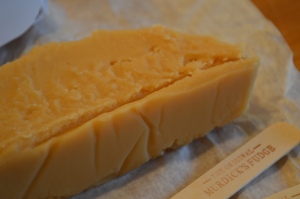
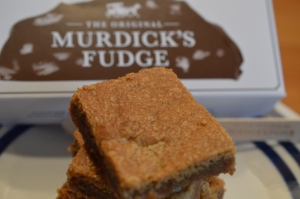
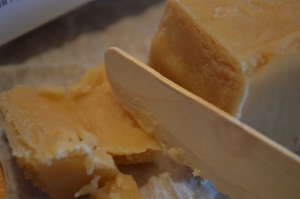
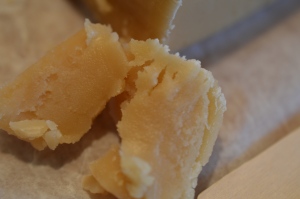
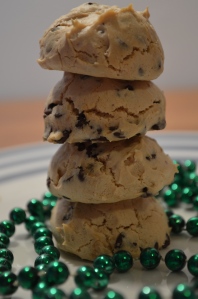
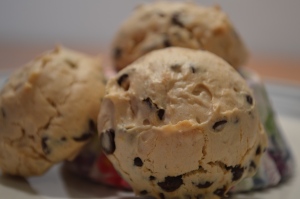
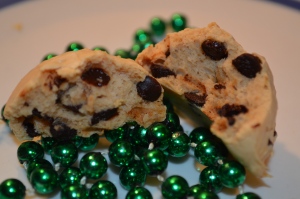
I also went into numerous fudge shops to sample the fudge. I ended up purchasing some fudge from Murdick‘s, which of course is hands down my favorite fudge there. It is just so creamy and rich. I love it. I decided to use the maple fudge to make some bars. I adore the combination of maple and peanut butter. I’ve also made Maple Nut Peanut Butter Cookies, which are still one of my favorites.

DSC_0550DSC_0537DSC_0556

Maple Fudge Peanut Butter Bars

  • 1 Cup Butter
  • 1 Cup granulated Sugar
  • 1 Cup packed Brown Sugar
  • 1.5 Cups Mighty Maple Peanut Butter
  • 2 eggs
  • 2 tsp. Maple Extract
  • 1 tsp. Vanilla Extract
  • 2.5 Cups Flour
  • 1 tsp. Salt
  • 2 tsp. baking soda
  • 1 Slice of Frozen Maple Fudge, diced

Preheat the oven to 350. Freeze the fudge for at least fifteen minutes before dicing, or it will stick together in a big clump, then keep the diced fudge in the freezer until you are ready to add it to the dough. Meanwhile, Cream together the Butter, granulated sugar, brown sugar, mighty maple peanut butter, eggs, vanilla and maple extract.  In a separate bowl, whisk the flour, salt and baking soda together. Add the dry ingredients to the creamed mixture a little at a time and mix between each addition. Once the dry ingredients are incorporated add in your fudge and mix for 10 -15 seconds. Pour into a greased 9 x 13 pan, spreading the dough and pressing it down into the corners. Bake until dark golden on the edges, about 20 minutes, adjusting the time as necessary.

You could also make these into cookies instead of bars, by forming into balls and baking for 8 – 10 minutes.

DSC_0555

DSC_0549

DSC_0559

It’s SUMMER! Finally! Oven Dried Strawberries. TOTAL FAIL.

I’m so happy it’s summer! Everything is better in summer! Except my oven dried strawberries. Those were gross.

So I have been doing a few different things lately, I’ve been looking for a new job, I really want to relocate. Missouri is beautiful, but it’s time to move on. So far I haven’t had much luck, interviews, but no offers. Which stinks! Job hunting is the worst. I’m really hoping something new comes along soon though, but at least I’m still employed with the State, which I’m very thankful for. Usually…

funny-OK-rage-meme

I have also been looking into moving into a new apartment. I really want to get a cat or a puppy, but that means I have to move because my landlord is totally anti-pet, which totally stinks. It is really challenging finding an apartment that will allow pets. I also thought about getting some land and getting a tiny house, which is my dream, but land is so expensive, and everything has restrictions about what you can put on it. It’s so frustrating! Oh and if I relocate, that would be a huge pain to do. So I’m thinking I’ll be sticking with renting for now, until I figure out where I will be going, if I get a new job. Hopefully it will be back in Michigan. That is home and would be awesome! So as you can see, I’m totally indecisive and it’s driving me insane.

I decided to be healthy and kept seeing all these posts about how delicious oven dried strawberries are and how they are like candy. I don’t know what kind of candy these bloggers eat, but they aren’t like any candy I eat. They are absolutely disgusting. I tried baking them longer to see if that would help, and it made it worse. DO NOT MAKE THESE! They are GROSS!!!

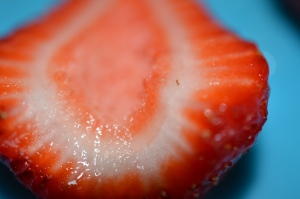
Here are the before pictures of my nice juicy ripe strawberries, getting ready to go to their death in the oven:

20150624_19 20150624_21

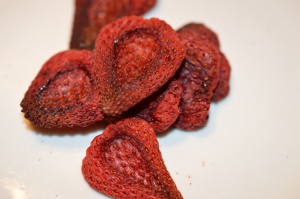
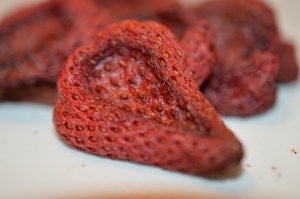
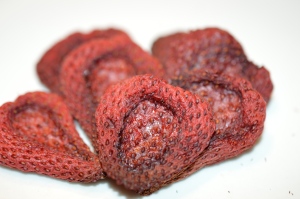
And here they are after I dehydrated them in the oven. I did it at 210 degrees for about 2 1/2 – 3 hours. The directions said if they were still gushy to put them in longer. All that did was burn them. It was awful. They were chewy on the edges and gushy in the middle. I am guessing I should have sliced them instead of quartering them. I’m not wasting any more berries though to see if that was the problem. This is just too cruel to do to delicious fruit. It’s a crime against strawberries. Poor poor strawberries.

20150624_33

20150624_29 20150624_27

So please, spare your strawberries, and your time. These are so not worth it. I can’t believe I wasted all of those poor strawberries.

The Many Adventures of Flat Stanley in Arkansas and Missouri

It’s been forever since I’ve done a post on here, but I had a visitor and I was busy showing him around parts of Arkansas and Missouri for the last few weeks.

Flat Stanley came to visit me all the way from Michigan. Apparently a bulletin board fell on him and squashed him and now he travels around the world in envelopes seeing the sites and reporting back to his friends. This time around Stanley was quite busy. He visited a goat dairy in Arkansas, the Lewis and Clark State Office Building, which houses the Department of Natural Resources and Department of Public Safety, the State Capitol and other sites around Jefferson City, Missouri. Stanley also was able to visit the Laura Ingalls Wilder Homestead in Mansfield, Missouri.

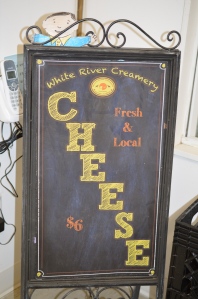
My cousins, Scott and Tessa McCormick, own and run the White River Creamery, located in Elkins, Arkansas. Stanley was able to make a quick trip down to the creamery to see how goats are milked and cheese is made.

DSC_0619

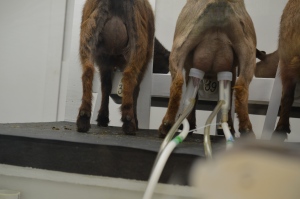
First the does were being milked by Emily. She hooked them up to a machine, which pumps the milk out of the udders. The goats don’t mind being milked as they get an extra special treat, grain, which they love, with each milking.

DSC_0617

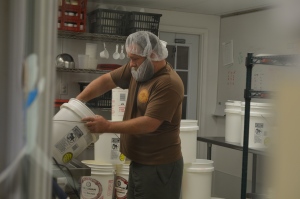
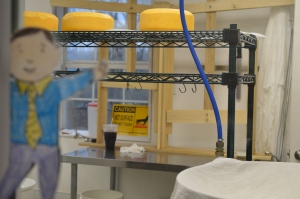
After the milking was finished, Stanley visited the cheese room, where Scott McCormick makes all of his cheese.

DSC_0621 DSC_0620

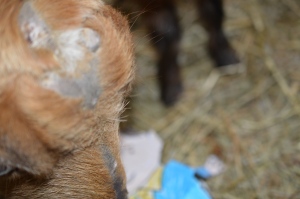
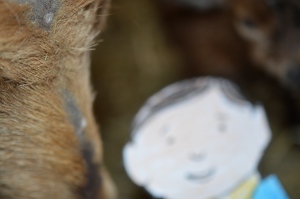
Stanley also found out goats like to eat everything, and he almost lost his arm to one of the does in the dairy, who was waiting for her turn to be milked. Fortunately he was able to be rescued just in the nick of time. Phew!

DSC_0543 DSC_0545

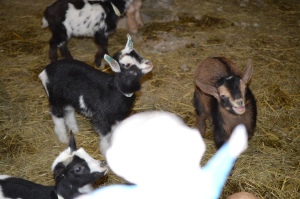
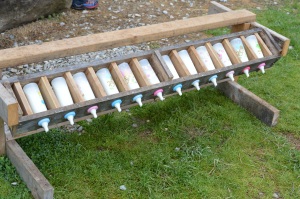
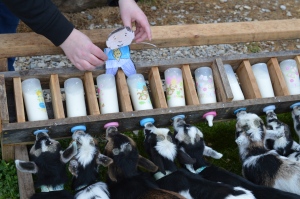
Spring at the dairy is kidding season, which means lots of baby goats, who are known as kids. The McCormick’s were able to come up with a way to feed 12 kids at a time and Stanley helped supervise the kids feeding time, making sure there weren’t any fights breaking out and that everyone got a fair share of the milk.

DSC_0483DSC_0486

DSC_0471 DSC_0470

While visiting the creamery, one of the does had two babies, a boy and a girl. Stanley was able to help clean up one of the kids.

DSC_0607 DSC_0605 DSC_0604

Stanley also accompanied me to work, as he was anxious to find out more about the Department of Natural Resources. The building is located right next to the Missouri River and has a natural prairie all around it. This is where Stanley first met his new friends, Meriwether Lewis and William Clark. DNR Building (2) DNR Building (1) DNR Building (3)

Lewis and Clark set out on an expedition in 1804 near what is now St. Louis, Missouri to find a route through the western portion of the United States. Sacajawea also assisted Lewis and Clark. She was a Shoshone Native American who was able to communicate with the Natives encountered on the trail.

DSC_0168 DSC_0197 DSC_0198 DSC_0209

After meeting with Lewis and Clark, Stanley decided to explore the Governor’s Gardens and Mansion.

DSC_0098 DSC_0102 DSC_0108 DSC_0104 DSC_0136 DSC_0138

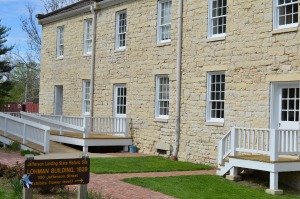
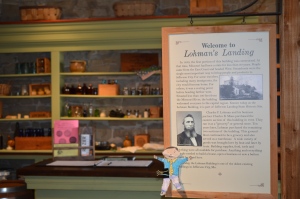
After seeing the gardens, Stanley hopped on over to visit Lohman’s Landing, a local mercantile, established in 1839, mainly used during the steamboat era. It is also the oldest building in Jefferson City, Missouri.

DSC_0165 DSC_0162

The train station is located next to Lohman’s Landing, with the trains running along the edge of the bluffs, overlooking the Missouri River.DSC_0160 DSC_0157

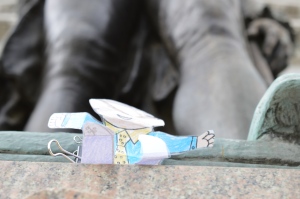
After visiting Lohman’s Landing and the train station, Stanley decided to explore the Capitol a bit. The Capitol was completed in 1917. The capitol is topped by a bronze statue of Ceres the Roman goddess of agriculture. DSC_0100

DSC_0221DSC_0217DSC_0216

DSC_0215 DSC_0214 DSC_0212 DSC_0211 DSC_0210 DSC_0194 DSC_0193
DSC_0189

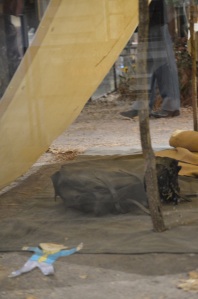
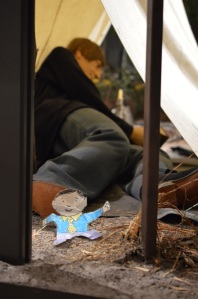
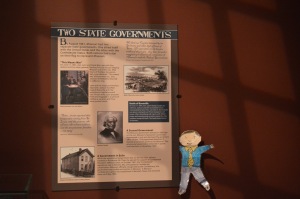
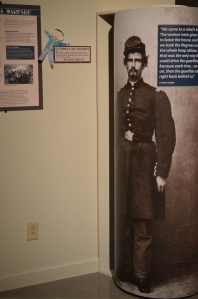
Stanley also ran into some Union Soldiers camping out near the Capitol building, who served during the Civil War. Missouri was quite divided between the North and the South. The Governor, Claiborne F. Jackson, while in Southern Missouri, ordered a Secession from the Union and Missouri was elected as the 12th Confederate State. Meanwhile in Jefferson City, the pro-Union legislators declared the state’s loyalty to the Union, resulting in two state governments and Missouri was represented in both the U.S. Congress and the Confederate Congress.

DSC_0181 DSC_0183

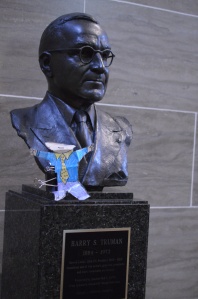
DSC_0185 DSC_0186 DSC_0188Stanley also ran into President Harry S. Truman. He was the 33rd president of the Unites States from 1945 – 1953, and was born on a farm in Missouri, his parents eventually relocated to Independence, Missouri, where he grew up and graduated from high school.

DSC_0202

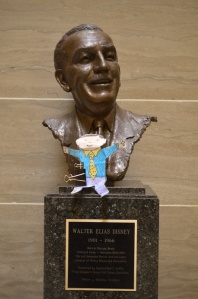
Mr. Walt Disney was also found lounging around in the capitol. Mr. Disney is best known for creating Mickey Mouse, Snow White, Donald Duck and many other Disney characters. He also created the Disney theme parks. Walt Disney moved to Marceline, Missouri when he was four and grew up on a farm there.

DSC_0206

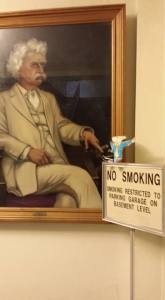
Mark Twain was found relaxing in the corner, smoking a cigar. He grew up in Hannibal, Missouri.  He wrote “The Adventures of Tom Sawyer” and “Adventures of Huckleberry Finn” and is known as one of the greatest American Novelists. Although he seems to be breaking the no smoking rule in the capitol.

11150219_10205119034828868_6965891721096377669_n

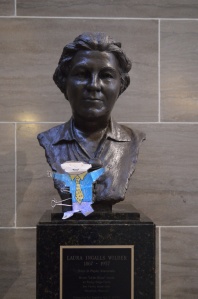
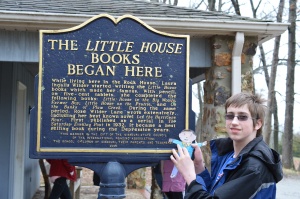
Laura Ingalls Wilder also happened to be at the capitol. She wrote her Little House Books at Rocky Ridge Farm in Mansfield, Missouri. Her daughter Rose Wilder Lane was also an accomplished author. Stanley had the opportunity while visiting to see her farm in person. Her stone house had electricity years before any of the other houses in the area. The stone from the house was taken from the area where the house was built.

DSC_0203DSC_0688

DSC_0670DSC_0675

DSC_0685

Missouri and Arkansas have lots more sights to see, but Stanley is anxious to return to Michigan to share all of his adventures with his friends. Sadly he will be leaving shortly for the trip back to Michigan.

Crazy times and Reuben Casserole – or is it Reuben Dip?

I’m back. I was hoping to have good news, but unfortunately I decided not to buy the house I was looking at. It was super cute with lots of old door hardware and beautiful wood floors, but it also needed work. There were cracks around the windows in the basement, you could see daylight through them, so it needed to be caulked, the half bath off the kitchen wasn’t done very well and needed to be gutted, and it needed lots of paint and there was wallpaper that needed to be removed. It was an older home and it didn’t have a garage or anywhere to put one. The yard was fenced, which was awesome and it was in a really good neighborhood, so I hemmed and hawed about it, but it ultimately just wasn’t a good fit for me.

My friend also had her baby, so I’ve been thinking up  things I can do for her. I want to help her out as much as possible, and I’m afraid I haven’t been a very good friend. I haven’t even been by to see her yet. I’ll be remedying that next week though when I bring her dinner. I can’t wait to meet the new baby!

One of my coworkers is moving on, so now I’ll be doing what she was doing, plus what I was already doing. Work is crazy right now. Hopefully they will hire someone to replace her and the other two engineers that left. My other coworker took on some extra duties as well. We are both swamped and it seems like it takes FOREVER for people to be replaced and they move on just as quickly.  I am baking up some sugar cookie bars with nutella frosting for her going away tomorrow. I’ll be sharing the frosting recipe on the blog later, I took a huge shortcut with the bars and used a mix, so there isn’t much to share there, other than I was feeling lazy and didn’t feel like making them from scratch.

20150326_5

I am super excited about this weekend. I am going to a native plant sale at the runge nature center here in Jeff. I am hoping I can get some native milkweed to plant so I can attract some butterflies. Hopefully it isn’t frightfully expensive though. I love flowers and butterflies. Spring is my favorite season. Everything starts coming back to life and blooming and it starts getting warm again. I love it! I am looking forward to the time when I’ll actually have a yard and be able to have a garden.

20150326_3

So to get in the spirit of St. Patrick’s day, and I know I’m incredibly behind, I decided to make a Reuben Casserole. I wanted to make it low carbish, so I started searching for a recipe on Pinterest and came across this one for Reuben Casserole from No Buns Please.

20150326_4

Although I pretty much destroyed their recipe and created my own from the bones of it. I detest ketchup. I don’t eat it. I also don’t eat mayonnaise if I can help it. I like it, but there is just way too much fat in it, although I think I made up for that when I added the thousand island dressing, which also screwed up the carb count.

20150326_8

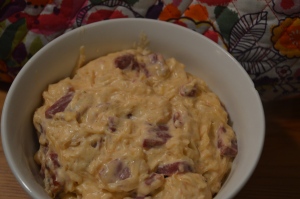
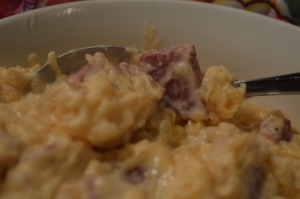
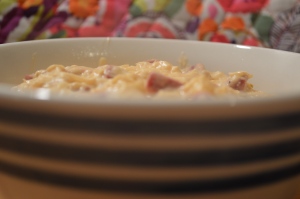
The casserole turned out to be super rich and creamy. This would make a better dip with some rye chips or as a spread on some rye bread. All in all it was pretty good but I wouldn’t make it as a main course again. I would probably also reduce the dressing to 1/4 cup next time to reduce some more of the fat from it.

20150326_2 20150326_9

Reuben Casserole Dip

  • 1 lb of deli corned beef, diced
  • 14 oz sauerkraut, drained
  • 2 cups swiss cheese, divided
  • 8 oz neufchatel cheese, or reduced fat cream cheese
  • 1/2 cup thousand island dressing
  • 1/2 cup greek yogurt
  • 1 tsp distilled white vinegar
  • 1 tsp salt
  • 1 tsp garlic powder
  • 2 tsp onion powder

Preheat oven to 350, grease a 2 quart casserole dish.

In a large mixing bowl combine the diced corned beef, sauerkraut and 1 & 1/3 cups of the grated swiss cheese.

In a microwave safe bowl, melt the cream cheese, dressing and greek yogurt, stirring every minute or so until it is all melted and smooth. Mix in the vinegar, salt, garlic powder and onion powder.

Pour the soup mixture over the corned beef mixture, stirring until it is all combined. Pour into the mixture into a prepared casserole dish and top with the remaining 2/3 cup of swiss cheese. Bake for about 20 minutes, or until the casserole is hot and bubbly and the cheese on the top is melted.  Enjoy!

Sopapilla Cheesecake Bars

Things have been a little nuts around here lately. I am beginning a house hunt. I am a little worried that I am not going to find anything, because I am super picky. I do have a ton of ideas pinned on pinterest, but some of the houses I’ve seen online are super ugly. Someone painted their wood floor white, and it was peeling and gross looking. And the wall paper! EEK! I hate wallpaper!  So this should be interesting. There isn’t any hurry to find a house though.

House-hunting-card

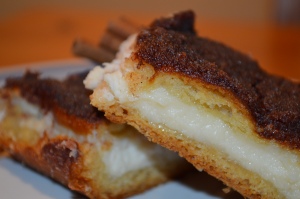
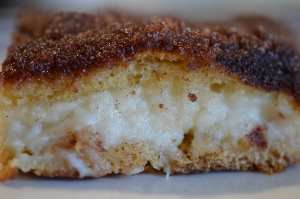
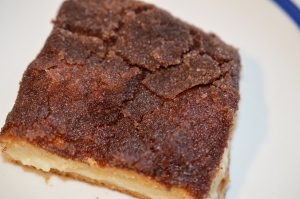
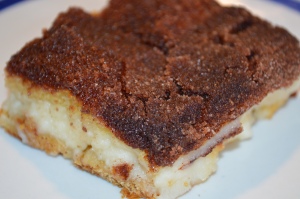
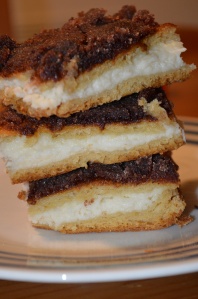
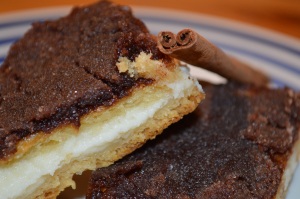
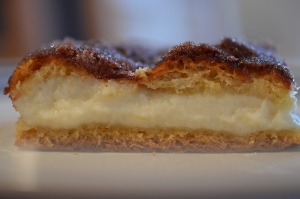
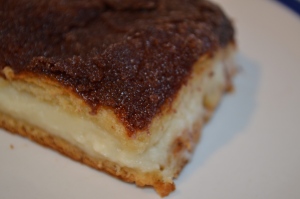
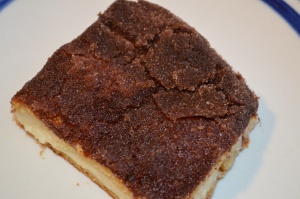
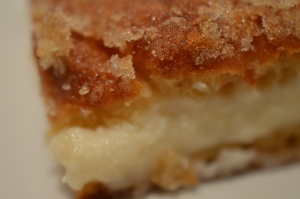
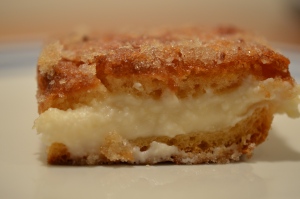
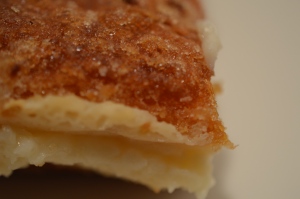
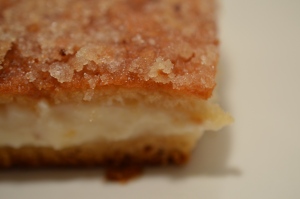
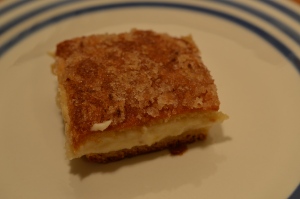
To get back to the recipe, I decided to use the crescent roll dough to make something with cinnamon and sugar. This dessert has always been one I enjoy at potlucks and such. The original recipe for Sopapilla Cheesecake Bars is from Pillsbury.

20150308_19 20150308_6 20150308_2

I modified the recipe by cutting down the amount of sugar and butter and then I added some cinnamon extract along with the vanilla extract to the cream cheese filling.

20150308_18 20150308_28 20150308_24

These have a nice sweet cinnamon flavor and are super easy to make. The crescent rolls I used have seams in them, but you can substitute them for seamless ones if you wanted to.

20150308_3 20150308_16 20150308_15

Sopapilla Cheesecake Bars

  • 2 packages of refrigerated crescent roll dough (8 oz each)
  • 1/2 cup sugar
  • 1 tbsp cinnamon
  • 2 packages of cream cheese (8 oz each)
  • 3/4 cup sugar
  • 1 tsp vanilla
  • 1 tsp cinnamon extract
  • 2 tbsp of butter, melted

Preheat oven to 350

Line a 9 x 13 pan with aluminium foil or parchment paper, making sure to overlap the sides of the pan, so you can lift it out later, and spray with nonstick cooking spray. Press one can of the crescent roll dough in the bottom of the pan, pinching together the seams and stretching to cover the bottom of the pan.

In a small bowl mix the 1/2 cup sugar and the cinnamon. Set Aside.

Add the cream cheese, 3/4 cup sugar, vanilla and cinnamon extract to a large mixing bowl. Whip until smooth and creamy. Spread over the crescent rolls in the pan.

Open the second can of crescent rolls, unroll it and carefully lay it over the top of the cream cheese mixture, being careful to stretch and spread it all the way across the pan.

Melt the butter and brush across the top of the crescent roll dough. Sprinkle the cinnamon sugar mixture over the top, being sure to cover it evenly.

Bake for 30 – 35 minutes or until the top is dark golden brown and the middle is set. Let cool at room temperature for about thirty minutes, then refrigerate until chilled, for at least one hour. I chilled them overnight.

Enjoy!

Lemon Cheesecake Bars

It’s SPRING!!! Well close enough anyway. 🙂 I am so excited that it is finally March. There is so much to do! I am already planning what I’ll plant out on my deck. I love flowers, spring, summer and best of all the warm weather. Although I could do without the dumb bugs, like mosquitoes, june bugs and cicadas. Ick. But it’s a small price to pay for summer!

spring-and-winter-jokes

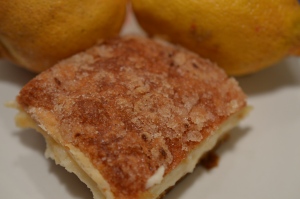
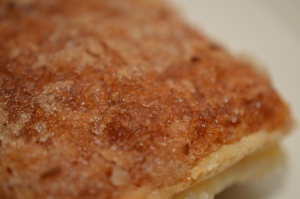
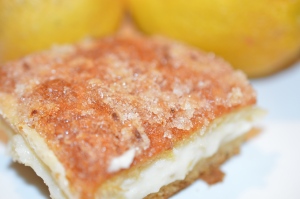
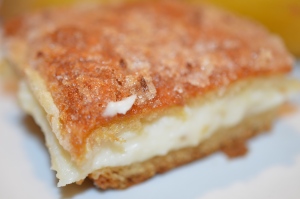
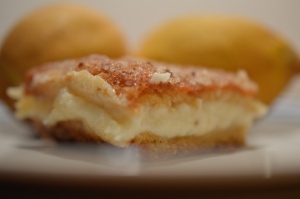
So in celebration of the upcoming Spring, I made Lemon Cheesecake Bars. These have an intense lemon flavor. I love it when a flavor is super strong and in your face. These are definitely not your ordinary lemon cheesecake bars. Super lemony and they are super easy to make.

20150302_15 20150302_2 20150302_1

I had four cans of crescent roll dough and a bag of lemons donated to me because a relative no longer needed it. I was debating what to do with them, when it hit me. Lemon Cheesecake Bars!! Yum! I was thinking of modifying the Sopapilla Cheesecake Bar recipe, but then happened upon this post from all recipes: Lemon Cream Cheese Bars.

20150302_10 20150302_3 20150302_5

I love lemon and I wanted to make this recipe a bit more lemony. Two lemons just isn’t enough in my opinion, I like a BAM! IN YOUR FACE! Lemon flavor. I don’t like subtle flavors AT ALL. If it’s lemon, it should scream lemon.  So I added an additional lemon, extra zest and some lemon extract. They turned out great! Super lemony and creamy.

20150302_27 20150302_7 20150302_24

Lemon Cheesecake Bars

Ingredients:

  • 2 packages of refrigerated crescent roll dough (8 oz each)
  • 3 lemons, juiced
  • 4 lemons, zested, divided (3 for the cream cheese mixture and 1 for the topping)
  • 1 tsp lemon extract
  • 2 packages of cream cheese (8 oz each)
  • 1/2 cup granulated sugar
  • 2 tablespoons butter, melted
  • 4 tablespoons granulated sugar

Preheat oven to 350

Line a 9 x 13 pan with aluminium foil or parchment paper, making sure to overlap the sides of the pan, so you can lift it out later, and spray with nonstick cooking spray. Press one can of the crescent roll dough in the bottom of the pan, pinching together the seams and stretching to cover the bottom of the pan.

In a small bowl mix the four tablespoons of sugar and the zest of one lemon. Set Aside.

Add the cream cheese, lemon juice, zest from three of the lemons and the lemon extract to a large mixing bowl. Whip until smooth and creamy. Spread over the crescent rolls in the pan.

Open the second can of crescent rolls, unroll it and carefully lay it over the top of the cream cheese mixture, being careful to stretch and spread it all the way across the pan.

Melt the butter and brush across the top of the crescent roll dough. Sprinkle the sugar and lemon mixture that was set aside in the first step.

Bake for 30 – 35 minutes or until the top is golden brown. Let cool at room temperature for about thirty minutes, then refrigerate until chilled, for at least one hour. I chilled them overnight.

Enjoy!

20150302_27 20150302_9 20150302_24

Peanut Butter Cream Cheese Meringues – Low Carb

Valentine’s Day is here and I wanted something I could indulge in without feeling too guilty. For me Valentine’s Day is the worst. I hate being reminded constantly that I’m single. Dating is so hard and it seems like it’s impossible to find anyone I’m interested in.

1511206_10204713377767695_3280765657247554400_n

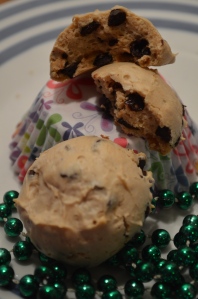
I was at work one day thinking about dairy and how several coworkers are allergic to it. Most of my recipes have butter, cream cheese, or milk in them. It is really hard to find a recipe that doesn’t. I refuse to use margarine, as it’s disgusting. Then from there I started thinking about meringue and how could I incorporate peanut butter into egg whites. I wasn’t sure about how well they would go together, so I googled it and from there experimented. This recipe is the first try. I still think it needs some tweaking, and of course I added cream cheese, so it isn’t dairy free, but all in all it isn’t bad for a first shot.

20150214_8

I started out with the basic egg whites, cream of tartar and salt, and whipped them until soft peaks formed. Then I continued whipping on a slow speed and slowly incorporated the splenda. I decided to use splenda this time around to try to keep the carbs to a minimum. It would have worked, if I hadn’t add the chocolate chips at the end.

20150214_4
20150214_11

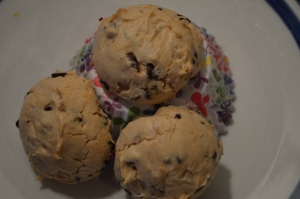
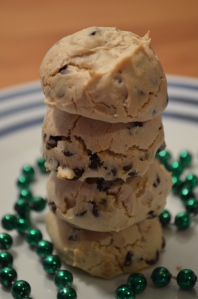
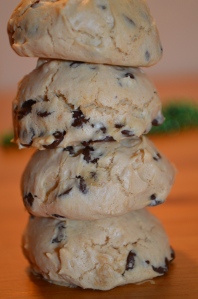
Anyway, once I incorporated the splenda I cranked up the speed on the mixer to high and let it whip until the meringue was stiff. Then I folded in the peanut butter and cream cheese, once these were mostly mixed in I added the mini chocolate chips. The whites deflated quite a bit once everything was incorporated, but they still turned out great.

20150214_15 20150214_5

Peanut Butter Cream Cheese Meringues

Makes approximately 24 cookies

  • 3 large egg whites
  • 1/4 tsp cream of tartar
  • 1/4 tsp salt
  • 3/4 cup splenda
  • 1/2 cup peanut butter
  • 2 oz cream cheese, softened
  • 4 oz mini chocolate chips (1/2 bag), optional

Preheat oven to 350, line two baking sheets with silicone mat or parchment paper.

In a large clean glass or metal bowl, whip the egg whites, cream of tartar and salt until soft peaks form. Slowly incorporate the splenda about a tablespoon at a time. Once all the splenda is added, turn the mixer up to high and whip until stiff peaks form.

In a separate bowl whip the cream cheese and peanut butter together.

Once the egg whites are stiff, fold in the peanut butter mixture, folding until the peanut butter is well incorporated, the whites will deflate a little. Add in the chocolate chips. Scoop onto the baking sheet, leaving a bit of room between each cookie. Bake for ten minutes. Turn off the oven and leave the cookies in the oven for an additional fifteen minutes. Remove from oven, cool and enjoy!

Per my fitness pal, each cookie has approximately 79 calories, 6 grams carbs, 6 grams of fat and 2 grams of protein. Without the chocolate chips, each cookie would have approximately 44 calories, 2 grams of carbs, 4 grams of fat and 2 grams of protein.  THESE ARE ESTIMATES ONLY

20150214_9 20150214_10

Red Velvet Oreo Truffles

Thank you to April Cobb for the greatest idea ever. Without you I probably wouldn’t have made these Valentine’s Day truffles!!

20150208_2

20150208_19 20150208_25

Oreo has come out with a new flavor of cookie. Red Velvet. I absolutely love these. I was talking about these with my friend, April, and she mentioned truffles, so I stole her idea and bought two packages to make them. Unfortunately before I could make them, one package just disappeared. It’s still a mystery to where it could have gone….

20150208_14 20150208_9

The truffles are the easiest things in the world to make. I used my food processor to mush them up into crumbs, processing about half the cookies at a time. You could also use a zip-top bag and a rolling-pin if you don’t have a food processor. Just smash them into crumbs, cream and all.

20150208_5 20150208_31

Once you have your crumbs, blend them with the cream cheese and extract and then shape into balls and freeze.

20150208_17 20150208_39

Once the balls are frozen, and make sure they really are frozen, dip into melted chocolate and top with the garnish.  This is the hardest part. For some reason I rarely can get the smooth perfect balls, and they look like a five-year old dipped them, but they still taste good. Which really the taste is all that matters right?

20150208_22 20150208_24

I decided to use heart sprinkles, because I like to make things pretty, and it helps to cover up some imperfections caused by the dipping process.

20150208_30 20150208_7

Red Velvet Oreo Truffles

  • 2 packages (roughly 40 cookies) red velvet oreos
  • 8 oz cream cheese, softened to room temperature
  • 1/2 tsp butter flavored extract
  • white candy melts
  • light cocoa candy melts

Line two baking sheets with wax paper.

Place about 20 cookies in the food processor and process until they are crumbs. If you don’t have a food processor use a zip-top bag and a rolling-pin and whack them until they are pulverized. Pour into a large bowl and then repeat with the remaining cookies.

Add the cream cheese and butter flavored extract and mix until well combined. Take the dough and form into small balls with your hands. I did about a tablespoon per ball, placing the balls on the prepared cookie sheets. Place each sheet into the freezer for at least 30 minutes.
Before you remove the balls from the freezer, heat the candy melts in a microwave safe bowl in 30 second increments until the candy melts are melted and smooth. Remove from the freezer and dip each ball in the candy melts, place back onto the wax paper and immediately garnish with sprinkles or nuts or whatever. Once all the balls are dipped then place the truffles in the refrigerator for about ten – fifteen minutes to set up. Enjoy!

20150208_15 20150208_13

Lemon Mousse

I am wishing for spring. It is one of my favorite seasons. Everything starts growing and blooming and there are colors everywhere. I am so tired of winter and ugly brown grass and mud. It hasn’t been a very pretty winter here at all. To brighten things up I decided I needed something colorful and cheery.

20150201_25

The way things have been going lately I really needed something I could whip up easily. Between exercising, looking for a new place and packing everything is just crazy. Add in time for baking and there just isn’t enough time in the day to do everything. It’s enough to make me crazy.

20150201_23

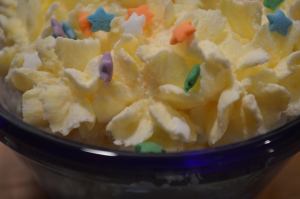
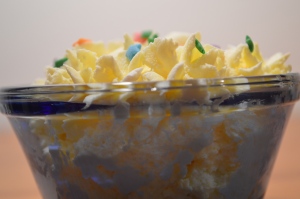
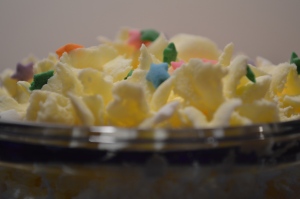
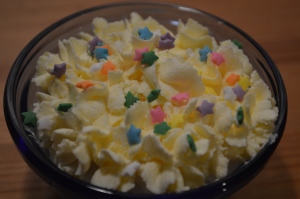
This dessert is low carb, although there is artificial sweetener in it, it is super thick and creamy. The lemon flavor is pretty subtle, so you may want to add some lemon zest or even a little lemon extract to it.

20150201_22

Lemon Mousse

  • 4 oz cream cheese, softened
  • 2/3 cup heavy cream
  • 1 box (4 serving size) sugar-free lemon flavored instant pudding mix
  • sprinkles for garnish

Place the cream cheese in a mixing bowl and whip for about 30 seconds. Add in the cream and pudding mix, whipping until thick and creamy. Pour into individual ramekins and refrigerate until ready to serve. Garnish with sprinkles right before serving. Enjoy!

20150201_26 20150201_19

Creamy Cauliflower and Ham Casserole (Low Carb)

I apologize for the lack of updates on here. Time just got completely away from me.

20150201_37

This winter has just been so bizarre. It was 61 on Wednesday. It’s January, yet felt like spring. I have been spending all my time walking and running outside, enjoying the nice weather. Now it’s back to being colder, with a mixture of rain and snow. Which is a bit more typical of January. It was so warm at one point I saw bugs and the grass was beginning to poke through the ground in places. Too bad it’s back to winter now.

20150201_39

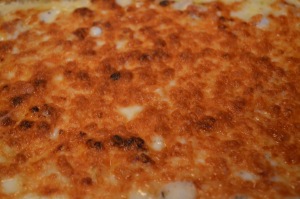
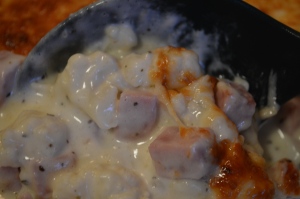
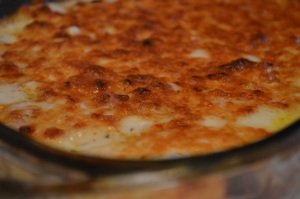
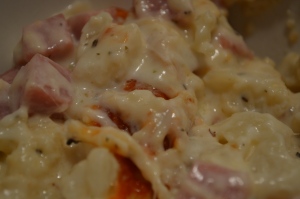
I decided that I wanted something hot and creamy, yet low in carbs. I love creamy sauces over pasta. There is just something so good and comforting about them. I decided that I needed to nix the pasta though. In its place I used ham and cauliflower. The sauce is super rich, thick and creamy.

20150201_35

Creamy Cauliflower and Ham Casserole

  • 1 cup cream
  • 4 oz cream cheese, softened
  • 8 oz (2 cups) shredded mozzarella cheese
  • 8 cloves or 2 tbsp minced garlic
  • 1 tsp onion powder
  • 1 tsp dried Italian seasonings
  • 1-16 oz bag of diced ham, drained
  • 1-16 oz bag of frozen cauliflower
  • 1 1/4 cups, 5 oz or one container of shredded Three Cheese Blend of Parmesan, Romano & Asiago cheese

Preheat the oven to 350, spray a 9 x 13 baking pan with cooking spray.

Combine the cream and cream cheese, blending until thick and creamy. Add the mozzarella cheese, garlic, onion powder and Italian seasonings mixing until well combined. Add the cauliflower and ham, stirring to combine.

Pour into the 9 x 13 pan and bake for 30 minutes. The casserole should be bubbling at this point.
Pull out of the oven. Turn the oven up to broil. Cover the top of the casserole with the three cheese blend, place under the broiler for 3 – 5 minutes or until the top of the casserole is a golden brown.
Enjoy!

20150201_46